How to fit a pedal-assist sensor (PAS)
The pedal-assist sensor (PAS) tells your motor to help as you pedal. On Cyclotricity front- and rear-hub kits it's a magnet disc that fits onto your square-taper bottom-bracket spindle, read by a small sensor mounted on the frame. It takes about 15 minutes. If your bike has a Hollowtech or press-fit bottom bracket the disc won't fit — you can ride on a throttle instead, or have a shop swap in a square-taper BB.
Watch the installation
Tools you'll need
- Allen keys
- Zip ties
- Optional: hot glue (if the magnet disc drifts)
What's supplied
- PAS magnet disc and sensor (included with the kit when you buy the PAS option)
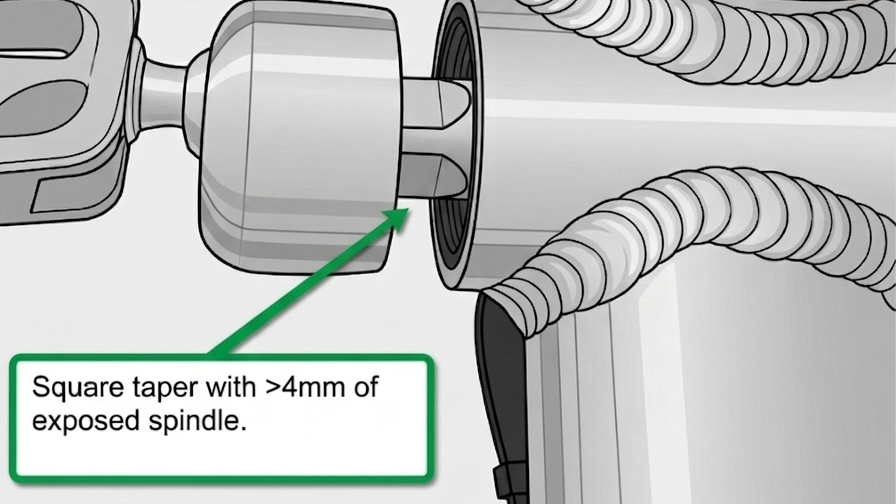
- A square-taper bottom bracket with a few mm of exposed spindle
- 1
Understand what the PAS does
The PAS has two parts: a magnet disc that spins with your cranks, and a sensor mounted to the frame that counts the magnets passing. When you pedal, it signals the controller to deliver assist — smooth and automatic. It only works with a square-taper bottom bracket.
- 2
Check your bottom bracket type
Look at the spindle your left crank bolts to. A square-taper BB shows an exposed square spindle with a few millimetres of clearance — that's what the magnet disc needs. An integrated Hollowtech / press-fit BB has no exposed taper and won't take the disc (skip to the last step for options).
- 3
Fit the magnet disc onto the spindle
Dismantle and fit the magnet disc around the bottom-bracket spindle, behind the left crank, so it spins with the cranks. On a hub kit you do this as part of fitting the bottom bracket / crank.
- 4
Mount the sensor on the frame
Fit the sensor on the down-tube or seat-tube — whichever lets it sit closest to the magnet disc. Position it so the bottom of the sensor (the "plus" mark) lines up with the gap in the disc, as close as possible without touching.
- 5
Check the blink and secure it
Rotate the disc by hand: a correctly aligned sensor blinks its red light as each magnet passes. The sensor's adhesive isn't enough for real-world use, so secure it firmly with zip ties. Route its lead toward the controller.
- 6
Connect, test, and fix any power cut-out
Plug the PAS connector into the loom, power on and pedal slowly — assist should engage almost immediately. If a long spindle lets the disc drift away from the sensor and power cuts out mid-ride, push the disc closer and, if needed, use a dab of hot glue to hold it in place.
- 7
If your bottom bracket won't take a PAS
Two options: (A) skip the PAS and ride on a throttle instead — thumb-press and go, no pedalling needed (add one from any Cyclotricity kit page); or (B) have a bike shop swap your Hollowtech/press-fit BB for an inexpensive square-taper unit (it needs specialist tools). You can run the kit without PAS in the meantime. Ask Cyclotricity if you're unsure which suits you.