How to install a front-wheel e-bike conversion kit
Fitting a Cyclotricity Front-Drive 250W conversion kit takes most people about two hours with basic tools. The recommended approach: connect and bench-test the electronics first, then swap your front wheel for the motorised one, transfer your tyre across, seat the torque washer, fit the optional pedal-assist sensor, mount the battery and controller, and connect the colour-coded plug-and-play cabling. No soldering — and the 250W front kit needs no torque arm, making it the most beginner-friendly Cyclotricity kit to install.
Tools you'll need
- Adjustable wrench
- Set of Allen keys
- Flat and crosshead screwdrivers
- Grease / lubricant
- Zip ties
- Tyre pump
What's supplied
- Cyclotricity Front-Drive 250W kit (motor pre-laced into your wheel)
- Controller, system cable and colour-coded connectors
- Battery — frame or rear-rack (or your own 36V battery)
- Optional: PAS sensor, throttle, LED display (or the green cap if no display)
- 1
Bench-test the kit before you fit anything
Cyclotricity recommend wiring everything together before mounting it, so you learn the connections and catch any issue early. Connect the motor and system cables to the controller, then the throttle (yellow branch), e-brakes (red branches), display (green branch — or the supplied green cap if you have no display), and finally the battery. Where connectors have arrows, line them up and push fully home. Switch the battery on and tap the throttle for a split second — if the motor twitches, power is flowing. Then disconnect everything ready to mount.
- 2
Check your forks fit the motor
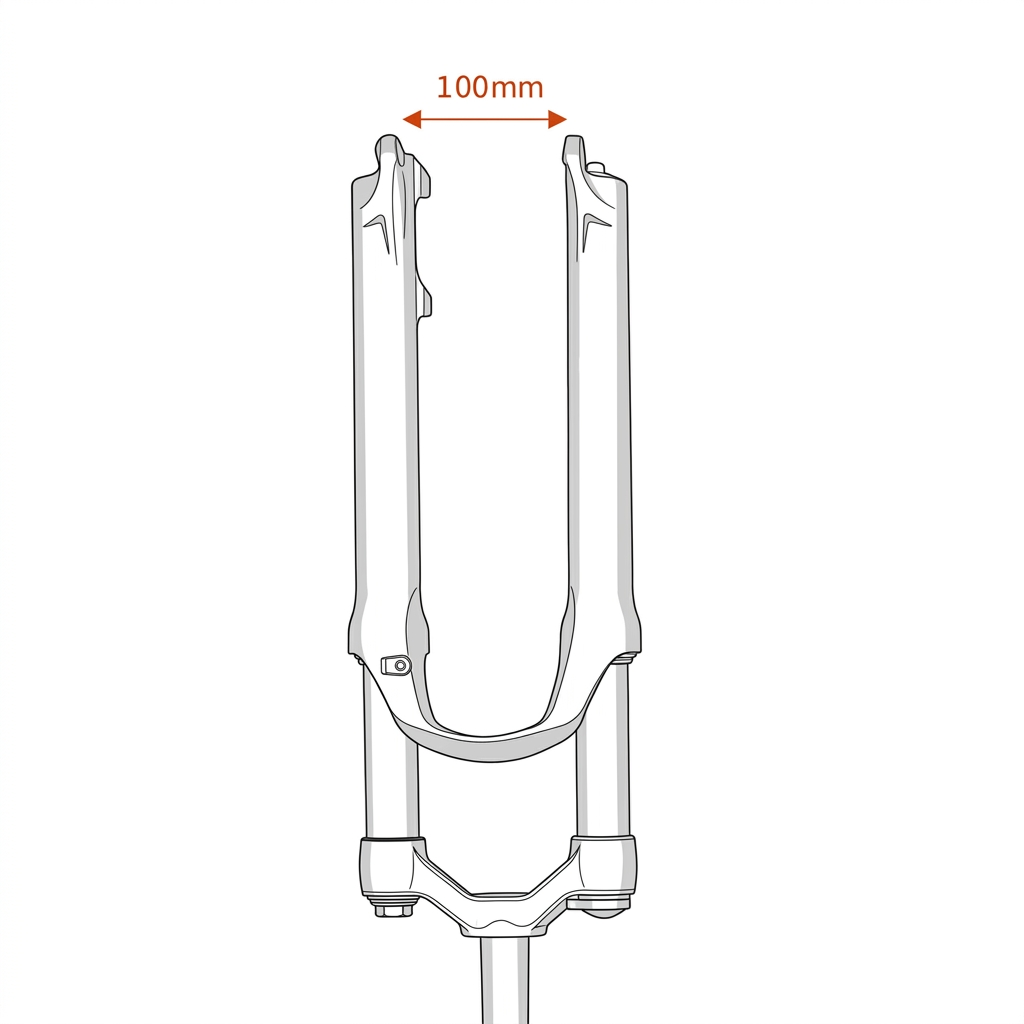
Two measurements decide fit: the dropout slot must be 10mm wide (most forks are; a 9mm steel fork can be carefully filed to 10mm — never file aluminium or carbon), and the gap between the dropouts should be the standard 100mm. If your forks are carbon or aluminium and don't fit, don't force them — contact Cyclotricity about a mid-drive kit instead.
- 3
Remove your existing front wheel
Turn the bike upside down so it rests on the saddle and handlebars, release the brake, undo the axle nuts or quick-release, and lift out the front wheel.
- 4
Move your tyre onto the motor wheel
The motor comes as a bare wheel, so transfer your tyre, inner tube and rim tape from the old wheel onto the motor wheel. If your bike has disc brakes, also move the disc rotor across onto the motor.
- 5
Fit the motor wheel and seat the torque washer
Drop the motor wheel into the forks with the motor cable pointing the correct way (forward/down when the bike is upside-down, per the manual). The kit includes a torque washer — a washer with a small flange — which must slide into the dropout from the inside so it locks the axle against the fork. This is standard on the front kit; no separate torque arm is needed.
- 6
Tighten the axle and check the wheel
Fit the supplied washers and nuts on the outside of the dropouts and tighten firmly. The wheel should be secure yet spin freely. Re-centre and adjust your brakes (disc or V-brake) so they're clear and biting properly.
- 7
Fit the pedal-assist sensor (optional)
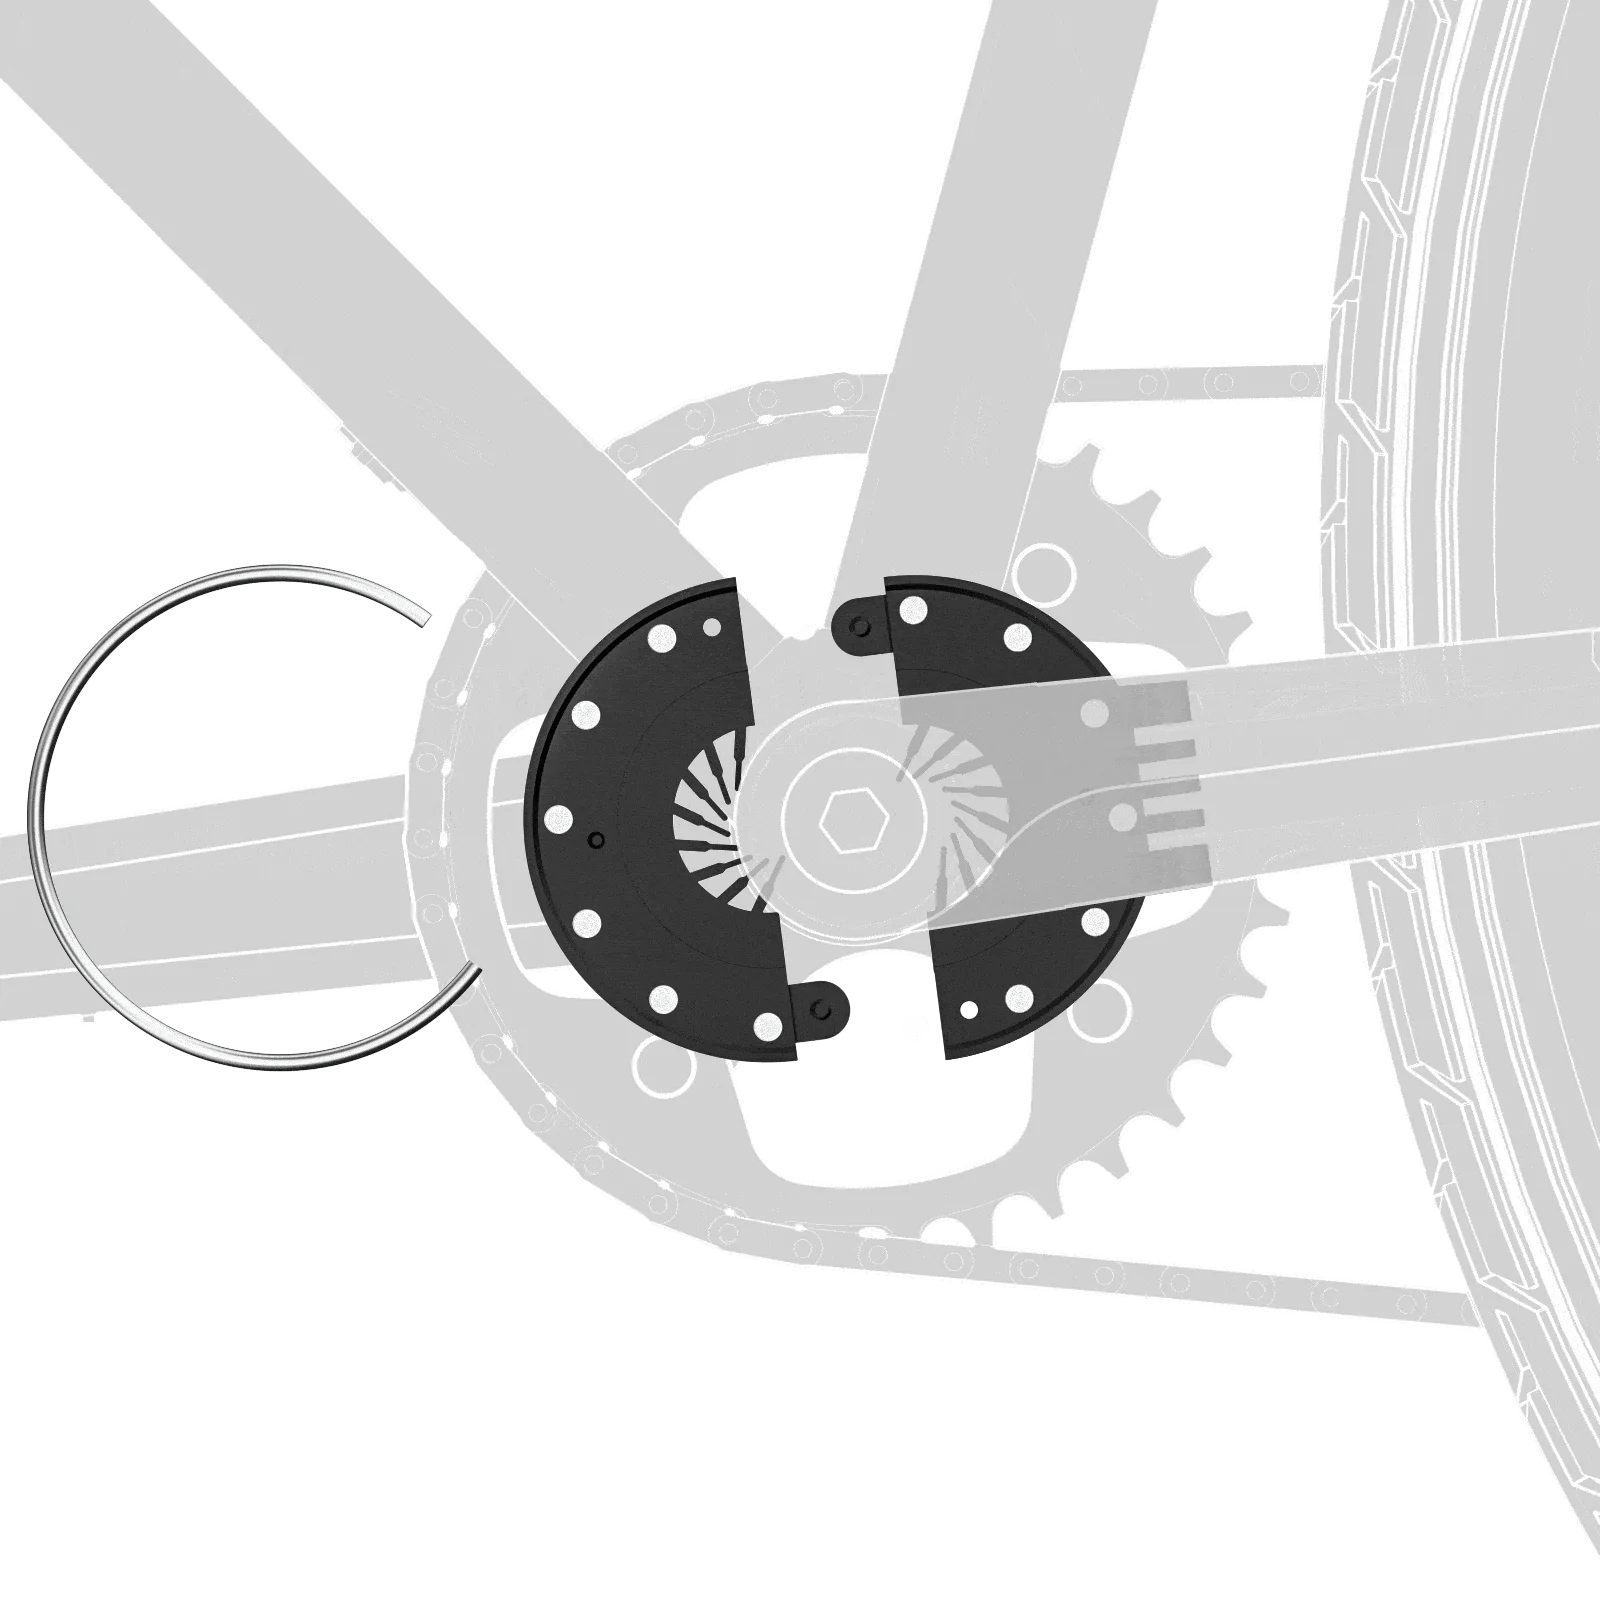
If you bought the PAS, fit its magnet disc onto your square-taper bottom-bracket spindle and mount the sensor on the down-tube or seat-tube, as close to the disc as possible without touching. The red light should blink as the disc passes. Zip-tie it firmly. Full detail in our PAS fitting guide. No square taper? You can ride on a throttle instead.
- 8
Mount the battery and controller
Fit your battery: a frame/bottle battery bolts to the down-tube bottle-cage bosses; a rack battery clips onto the supplied pannier rack. Put the controller in its plastic box or Velcro bag and mount it on the frame, keeping the bullet connectors inside the housing where they stay protected.
- 9
Fit the handlebar controls
Fit the throttle and display on the handlebar (slide the grip off with a little lubricant first). The supplied e-brake levers cut the motor when you brake and are recommended — but they're optional, and they can't replace brake levers that are integrated with gear shifters, or hydraulic brakes; in that case just leave the red connectors sealed. If you have no display, connect the green cap instead.
- 10
Connect the colour-coded cabling
Reconnect everything as you did on the bench — connectors are colour-coded and plug-and-play (yellow throttle, red e-brakes, green display). Route the loom along the frame and zip-tie it, taking care not to pinch the gear or brake cables, and leaving slack for the bars to turn fully.
- 11
Power on and test ride
Switch the battery on, hold the display button to power up, lift the front wheel and tap the throttle — the motor should spin. If you fitted PAS, pedal and check the assist engages. Do a slow test in a safe space, re-check the axle nuts after the first few miles, and you're converted. Stuck? Cyclotricity's diagnostics and support can help.